Just a small disclaimer to start. I am NOT a seamstress! These were done based off of a pattern on With A Tangled Skein and I modified it to a "T" pattern that fits my baby better. You might find her tutorial to be more complete or easier to follow. This is my first tutorial, so if you see anything amiss, please let me know! Now, on with Upcycled Diapers!
The Pants
I brought these home in anticipation of making diapers out of them, but my kids thought otherwise! It does give you a perspective of how big the pants are (4X) so that you don't go thinkin' you can make 3 dipes out of a pair of regular jogging pants.
Here are the pants laid out in preparation of the first cut! They are jogging pants from a local retailer, clearance price of $1.50. So, with 10% tax, that's $1.65 for the pair. You can use a sweat shirt, but you'll only get 1 diaper from a large sized shirt.
First, I cut the waist band off.
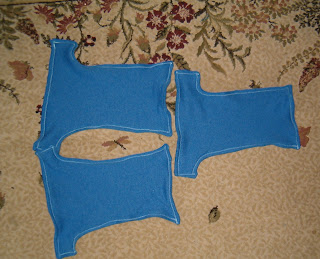
Second, I cut the seams apart so that I had 2 pieces that looked like this.
Next, I found a diaper that I had made previously that I liked. At first, I made the preflats as mentioned above, but they didn't fit well, so I modified them into a "T" shape.
I tried several configurations and finally managed to get 3 diapers out of the material! You'll need to draw your diapers a bit larger than actual fit in order to figure in seam allowances.
After you've drawn all your diaper shapes (you can draw on front side or back side because it will all get covered once you sew), place the cut out shapes onto the other larger piece of material RIGHT SIDES TOGETHER and draw the outlines. This time, you can draw the exact shape because you've already built in your seam allowances.
Cut out the second set of diapers.
Put the originals RIGHT SIDES TOGETHER and sew around the edges using a 1/4" seam allowance and a zigzag stitch. Be sure to leave a small opening in the short end of the diaper for turning the fabric. You will want to use a smaller zigzag, but not too small so that the material doesn't bunch.
Trim up your edges and snip notches along corners and bends. It's important to have neat and close edges!
Turn your diaper right side out.
Next, make sure all corners and edges of the diaper are fully turned out. Fold under the open space along the short end and sew together using a very narrow straight stitch.
Finally, sew around the perimeter of the diaper with a larger zigzag stitch and using about a 1/2" seam.
You could put more layers together, but these diapers work great as 2 layers with a liner and a wool cover.
And just one more of the gorgeous model, helping mama make the diapers:


